Friday, March 6, 2009

Carp-Diem Boat project


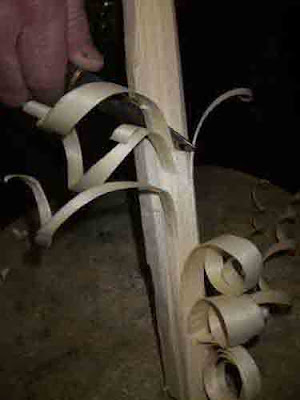
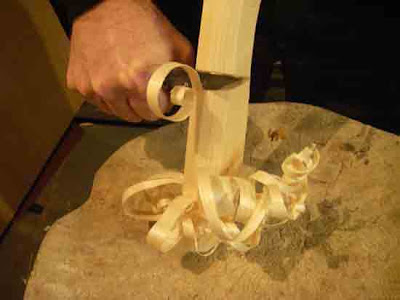
About a month ago I started working on a boat. A completely handmade wooden boat. It has been something on my future projects list for quite some time. I scoured the internet for just the right boat, I bought a couple plans, but there are loads of good, solid, basic designs for free. Although my Dad, who lives just a little ways away, has a well stocked woodworking shop, most of what I found could be built with more simplistic tools such as a jigsaw.

I found a small flat bottom skiff-dingy capable of being rowed, paddled or motored along.

Perfect for bow fishing for carp. I am really looking forward the the Idaho Traditional Bowhunter's Carp-ie Diem bow fishing outing!

It fits in the back of my rig for a quick trip to a local bluegill pond or is light enough for solo car topping.

I modified the plans a little and added higher sides and shortened the overall length just a little bit, but it remains to be seen if this will be a one man or two man craft.

Thursday, March 5, 2009

In praise of the lowly bandana

Recently I found a thread over on britishblades.com about your four favorite bushcraft items. Of course, a knife, firesteel and axe or saw were on nearly everyone's list. A hank of 550 cords would also be up there.

But my choice might be a bandana.

There are hundreds of uses for the little 20" square of cotton (sometimes the only cotton I take with me into the woods). I am reminded of my earliest "bushcraft" book, one I have possibly read more than any other book, the Boy Scout Manual. Scouts around the world typically have a bandana around their neck. I think I prefer a square bandana to the scout's triangle, but either way, the uses are only limited by your imagination and the situation.

Sling, sunshade, waterfilter, mosquito net while sleeping, dishcloth, headband, napkin, tourniquet, tie your hair back ( for those of the long hair persuasion), blow your nose (hankie), "lunchbox", evaporative cooler (roll it up, dunk it in water, tie it around your neck. It will cool your jugular veins and carotid ateries nicely), travel identification (give everyone in your group the shame color and waer them, or tie one on your luggage), placemat, camera lens or sunglass cleaner, tie extra stuff to your backpack, a "Punky Brewster" bracelette, carry foraged goods (mushrooms, berries, shells, rocks....), dust mask (old West style), sweat wiper, tear soaker, belt (I might need more than one), bandage, washcloth, potholder, sleep blindfold (my secret to travel, along with some earplugs, I sleep like a bay anywhere), fly swatter, gift wrap, head and neck sun protection (try tucking it under your hat, Lawrence of Arabia style), dog coller, ice compress, mark a trail, use as a "terrible towel" to chear at a sporting event, signal, water filter, neck gaiter for cold mornings, and possibly my favorite one I found while browsing the internet.....


"disguise your voice on the phone."

Wednesday, January 14, 2009

Gerber Artifact


Another useful bit of EDC I have been toting around is the new Gerber Artifact. It's pretty small in statrue and feels pretty burley. Nail puller, wire stripper, bottle opener, phillips and flat head screw drivers and a replaceable hobby knife blade that locks into place. Lots to love and not a lot to notice carrying around.


Not my picture by the way, I ripped it from multitool.org...

Friday, January 9, 2009

Sheath

I recently finished a sheath for a knife I wrote up a while back. I stayed with a British bushcraft look and kept the bottom square and included a ferro rod loop. I tried to spice up the top of the sheath with a little wave and also waxed the sheath using Old Jimbo's tutorial a little ways down the write up on his Grohmann knife kit.

I have really enjoyed the SWC Woodlore clone though I haven't really put it through it's paces. It is super-burley thick, too thick for my taste, but very stout and reliable because of it.

I have yet to take the time to photograph my process but I learned all that I know from tutorials over on britishblades.com, north coast knives, and others. My stitching is the weak point, looks OK from the front, but you'll notice there are no photos of the back, it gets all crooked. It should hold up just fine though, and it's nice to carry something you've crafted yourself.

Wednesday, January 7, 2009

My EDC


Just thought I'd share what I carry around with me on a daily basis. It is a Victronox Swiss Army knife with a scout sparker attached. Simple, effective, lightweight, small,... just about everything I need. And nothing I don't. I tend to use the phillips head screwdriver more than I would a corkscrew, but I'd still like to have the corkscrew. In the picture I forgot to pull out the saw, but it does have the saw, tweezers and the useless toothpick as well.

Not many days go by that I don't use it. Opening boxes, reoving splinters, tightening screws, opening a cold brew.... it's all taken care of.

And the view out the back door this evening. Might be hard to get a feel for the scale, but we always appreciate the view.

Monday, January 5, 2009


Carving the Classic Feather Stick
by Jim Dillard

Among bushcrafters a person’s skill is often judged by their ability to make a quality feather stick. Making a quality stick not only requires top-notch knife skills, it also requires the maker to know a variety of woods and their characteristics.The feather stick is important for several reasons. The most obvious reason and use of the stick is of course to start a fire. A flame touched to several well-made sticks will start a fire even when the wood is damp. Any camper can find themselves in conditions where the only firewood available is damp, and these are often the times when you need a fir e the most. Where I live in a sub-Arctic rain forest, there is always abundant wood, and it is always wet, so wet-wood fire skills are a must.Another reason to practice making the sticks is that it quickly improves general knife skills. Every bit of competence you earn with a knife will transfer to other projects and will also make you a safer knife user in the field.

The Wood

To learn which wood in your area makes the best feather stick, you will need to experiment and observe. Part of bushcraft is a continual process of experimentation with the resources around you. What you read in books may not always apply. For instance, I have read that willow is an excellent wood for feather sticks. In some places that may be true, but where I live most of the willows are too small to make feathers, and those pieces that are large enough are too hard to make anything but a poor stick. So – start with the softer woods in your area, and try them all. In my area nearly the entire forest is made up of spruce, and all varieties of northern cedar are found as driftwood on the beaches. All of those woods seem to work equally well.Learn to read the wood grain – observe and remember. Generally, evergreen woods such as pine and spruce should be carved with the blade at a 90-degree angle to the grain. Deciduous woods such as willow and aspen curl better when cut parallel to the grain. Woods with a tight grain pattern usually carve and curl better than woods with open grain. For instance, spruce wood with 20 annual rings per inch makes a better stick than spruce with only 10 rings per inch. Standing dead wood makes better sticks because standing wood is generally drier than other wood, but other woods will work too if they aren’t too wet. Most of the feather sticks I make are from driftwood found on the beaches near my home. This wood is wet on the outside, but usually dry in the center of the log. If the wood is dry enough to float, the center is likely to be dry enough to make a feather stick. Again, experiment with your local materials.Using saw or axe, cut the wood into pieces 16 – 20” long, then split into pieces that are roughly one inch square. Save the outside damp wood to burn when the fire is well under way.

The Knife

Any sharp knife with a full Scandinavian bevel will make a good feather stick. The full Scandinavian bevel is necessary because it is the bevel that is used to control the depth of the cut. The curls on a good feather stick will be at most 1/100 of an inch thick, with most of the curls being closer to half that thickness. Holding a convex or hollow ground bevel consistently at that exact thickness as it enters the wood is impossible. With the Scandi bevel, you simply hold the bevel flat against the wood and push in. The bevel and sideways pressure serve as your depth gauge. Since you will be pushing the knife edge straight through the wood without any kind of sawing action, you will need a finely sharpened edge, one sharpened to 4,000 – 6,000 grit and well stropped. This is no place for a “toothy” edge.The knife I am using in the accompanying photos is a Kellam Wolverine. The Wolverine won’t make a better feather stick than other similar knives, but since it has an edge hardness that is close to the hardness of a file, it will certainly make more of them without resharpening. Since I give boxes of feather sticks away as gifts, and since I have four woodstoves on my place, the ability to make lots of sticks in one setting is an advantage to me.

Cutting Techniques

Start with a stick about one-inch square. It should have a straight grain, not wavy, and should be knot free. With the bevel of your knife flat against the stick, carve five faces or facets the entire length of the stick. These will be 1/4” to 3/8” in width. ALWAYS keep your free hand behind the cutting edge. In photo #1, the facets are colored with a marker for clarity. Three of the facets are visible in the photo, and two more are on the other side of the stick. By managing the angle of your knife blade, you can control the direction the curl comes off of the stick. I have seen experienced woodsmen giggle as they discover exactly how much control they have by simply changing the angle of the blade just a few degrees. I like to make the curls on the left side of my sticks curl out a bit by cutting with the tip of my blade slightly up. The angle of the blade in photo #1 is about right. To make curls stay parallel to one of the facets, simply cut the wood with the blade a 90-degree angle to the stick as shown on photo #2.Photo #3 shows both good work and bad work. The curls coming off of the center facet are well made. They all have multiple curls – they will light easily and will make a good contribution to your fire. The two long curls way out to the side of the stick are poorly made. They will quickly burn off and fall away from the rest of the stick. They won’t do much to help you start a fire. The reason the curls stick out too far is that the tip of the knife is held too high – at too much of an angle. Your goal is to make a tight mass of curls. Adjust the angle of your knife accordingly.To get the wood on the right side of your stick to curl out a bit, hold the tip of your knife down. Be careful to not saw the wood, but keep the same part of your blade on the wood all the way down. This is more difficult than it looks and may take a bit of practice.With your knife bevel pushed flat against one of the outside facets, carve a curl the length of the stick to about an inch from the end. Then go to the next facet and the next till you have done all five. Then start over again. Carve curls until you feel the stick begin to flex from its thinness. At this point you are finished – or ready for an optional next step.Photo #5 shows an optional step. After I have finished making all the large curls, I sometimes make a series of tiny ones. The tiny curls are appropriate in two situations. First, if the wood is especially damp, the large curls may be difficult to start with a match. A single match will, however, light the small, thinner curls and if the stick is held upright, those will dry out the neighboring curls enough to get them started. Several years ago I tied up a bundle of spruce kindling and soaked it overnight in the lake near my house. The next morning I carved several feather sticks from the wet wood and finished them with the tiny curls at the base. A single match lit the small curls. Holding the stick upright with the mass of large curls on top, the entire stick was soon in flame even though the wood was fairly damp.The second reason for the tiny curls is less practical, but is a lot of fun. If they are thin enough, it is possible to light the curls with a firesteel. This isn’t easy. The difficult part is to get enough sparks targeted into the center of the curls. Early last spring I was teaching a bushcraft class to a group of teens. Even though I had started feather sticks with sparks before, that day I failed miserably, and I did so while every student was watching. An hour later a 17-year-old student accomplished what I had failed to do. He lit his feather stick with a firesteel and then lit his fire with that single feather stick. And this was accomplished with a piece of cedar driftwood he found on the beach only a short time before. The result was a renewed enthusiasm in all of the students present. It was a good day.I have read several bushcraft texts which claim that you must have a half dozen feather sticks to light a fire. If you make a featherstick the quality of the one in photo #6, you need only one. A single stick with this much curl and mass, along with some pencil-size kindling, will do the job every time.The key is observation, practice and a sharp knife. Be patient and keep trying.

Sunday, January 4, 2009

Duck Hunt

My brother and I were able to head out early Friday morning to do some duck hunting. He had been to this new honey hole but I had not. Neither of us has a boat or a dog so our choice of locals is pretty slim. This place was ideal with no crowds (there were two other groups there but plenty of water and space separated us) and shallow water. We chose an island so that we would have nearly zero chance of loosing a wounded duck in the reeds.

It was quite a morning with temperatures in the 50's and a storm front moving in later in the morning. I enjoyed his company as well made the 45 minute drive and the 20 minute hike to the ponds. We set up the decoys, sipped some hot coffee and began to wait. The walk in was very promising with loads of ducks getting up after we spooked them walking by in the dark.

We were actually good shots too! I know I can't hit much when I am hunting for dove, quail and chukars, but ducks seem to be slow enough and close enough that I can hit them and fold them pretty well. At the end of the day we bagged four ducks each and probably shot 11-12 times.

Brother Luke got pretty good at tooting on his duck calls as well. It's always hard to tell if my calling is doing any good or not.

All in all a very fun hunt. We could see a wall of storm bearing down on us from the West, pouring over the Owyhee range./ The wind started blowing in earnest ( it kept stalling the wings of my robo duck) and we ended up getting dowsed with a cold, driving rain. It cleared up as we were leaving.

Next up.... duck jerky!

Thursday, January 1, 2009

New Year's


I typically don't do much for New Years eve. Just another day of the year in my book. But I did spend a little time alone last night, thinking about life and what I want to accomplish in the coming 365. It was nice sitting by my porch fire, drinking a home brewed beer (blonde ale) and feeling the cold night air.

I made the same goals as much of the folks reading this might have made. I want to get out more, and that is the crux of it, my "New Year's resolution" boiled down into three little words. Fish more, hunt more, hike more, geocache more, bike more, explore more, and when I am not doing those things, I want to be doing activities to enrich those times. Studying edible plants, tying flies, making another longbow or creating this year's hunting arrows, working on new skills and improving the ones I already know, making a knife or a fishing net.... Because it is a big wide world out there and I love being in it.

Friday, December 19, 2008

Observation

With our recent snowstorms I have been thinking about the power of observation. My wife noted some tracks out in the backyard and asked what they were. Most likely a cat I said. I went on to explain that cats tracks seem to meander more than dogs do.

There are other observations to be made in the snow as well.

Snow will obviously melt on south facing slopes, but also on the south western side of exposed boulders.

There are ways to tell some really specific things about the weather, both on the ground and up in the atmosphere, but closely observing snowflakes.

Since wind can be a killer in the white months, when looking for a shelter, look around for prevailing wind direction. You will not bare patches, drifts and "frozen waves" or "dunes."

Wednesday, December 3, 2008

Still here


Well, it has been a looooong time since I last wrote here.

For my loyal reader out there..... I apologize.

I wasn't much of a backcountry hunter this fall. Or much of a hunter for that matter. Elk hunting was disappointing. Lots of other hunters about, no elk sighted or heard, but I did find some sign. Anyway, I ended up being so discouraged and had such a bad migraine, I came home early. I also found a nice little watering hole, but it was really brushed in and I couldn't figure out how to really hunt it effectively. I am sure the bulls were wallowing in it as the rut heated up. Alas, it was pretty clear when I was there, indicating it was just being used for drinking

And I haven't been too motivated to get out much since then. I'll blame it on the wife.... she is pregnant and I didn't want to leave her for extended lengths of time. And gas prices.... it's not worth it to drive an hour to hunt for two and come right back. And a new job... I didn't have any paid time off until recently. Anyway you slice it I didn't get out much.

But there still is time. I'll get out for rabbits I am sure, and birds, especially ducks, should start heating up with the coming colder, wetter weather.

I have a handful of projects for the dark winter evenings as well. I am planning a bowfishing- exploring boat.... a pirogue as a matter of fact. They are a cross between a canoe and a flat bottom jon boat. I am also continuing to work on a good, durable alcohol stove. And I have a knife that is now almost completely sheathed as well as one more puukko blade. Also I am going to attempt a fire piston! I found some good directions here, although I think I will end up "dressing up" mine a bit with some exotic wood scraps leftover from bows. And speaking of bows, I need to get going on a basic bowfishing model for the spring....